Be sure to turn on HD when watching the video. Hit play –> click the settings button on the bottom right–> Quality–> HD.
Nepal was the crown jewel and cornerstone of our yearlong trip. Of all the places we’ve wanted to go, our lust for the Himalaya was by far the strongest. As such, our travels were planned around ~1.5 months of Himalayan trekking in April and May. We began with the Three Passes Trek, a long loop through the Solukhumbu region of Nepal and Sagarmatha National Park. This is where the best mountaineers have come to test themselves against the world’s highest peaks for almost a century. The hiking and the views are absolutely unparalleled. In this post, you’ll find a video summary of our trip, our itinerary and packing list, trekking tips, and other essential information for a successful Three Passes Trek.

Click here to open the map in an interactive window
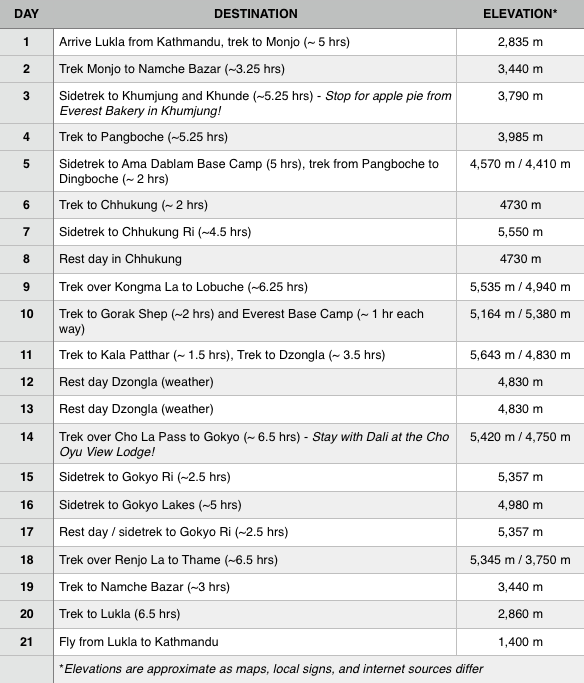
Why the Three Passes Trek? First, the challenge of crossing three high mountain passes and experiencing truly high altitudes called to us both. The trek takes you over 5,000 meters 8 times, reaching a maximum elevation of 5,643 m (18,513 ft) at Kala Patthar. Second, we’ve spent many years armchair-mountaineering our way through the Himalaya, reading all of the climbing epics and dreaming of the day when we’d finally see these legendary mountains through our own eyes. We couldn’t miss the opportunity to see first hand the places where pivotal events of mountaineering history have unfolded. Himalayan peaks like Everest, Cho Oyu, Lhotse, Nuptse, and Ama Dablam are celebrities of the mountaineering world, and the Three Passes Trek offers spectacular views of them all. Third, is there anything more satisfying than hiking in a big loop? Especially when you get to absorb the unique Nepali and Sherpa cultures along the way? Out-and-backs are just the worst.


Kathmandu: Our journey began in Kathmandu, a gritty city with tightly packed, dusty streets. Tourists love to hate on Kathmandu, but we immediately took a liking to it, probably because we had been looking forward to Nepal for so long. Delicious smells of curry and Indian spices waft through the air. Everything is brightly colored, from the clothing to the buildings to the prayer flags, and the warmth of the Nepali people was immediately apparent. Kathmandu boasts a very international tourist crowd, which makes for a fun bar and restaurant scene, and the excitement in the air is palpable, since mosts tourists are either preparing for or returning from the biggest adventure of their lives. When it finally came time to fly to Lukla, our stoke was at an all time high and the airport was full of nervous energy.
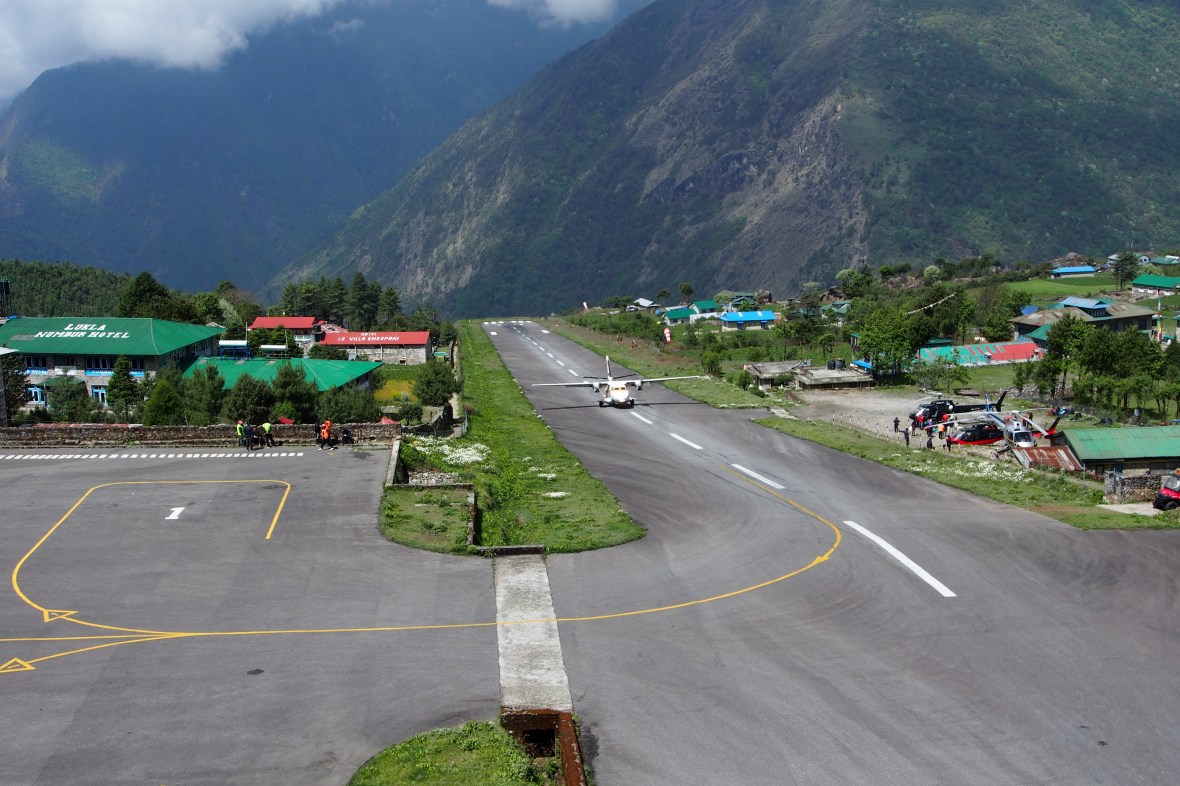
Flights in/out of Lukla can be wild (note the crazy short runway) and are highly weather dependent.
Stepping off the plane in Lukla was surreal. The airstrip is tiny and tucked beneath massive snow capped peaks. Yaks and burros with heavy loads amble down the “street”, and there are no cars – not a motorized vehicle within miles. And suddenly, after years of preparation, we were trekking in Nepal. It is hard to describe our feelings during these initial steps. To say we were filled with excitement, gratitude, and awe feels like an enormous understatement.
Itinerary: April 28, 2017 – May 18, 2017
A major key to our Three Passes game plan was to take it slow. This optimized our chances of successful acclimatization and allowed us to enjoy as many side treks as possible. Most importantly, we didn’t want to get sick and be forced to turn around or cut our trip short (something we saw happen over and over to people in a hurry). We recommend not buying a return flight until you get back to Namche so that you can be as flexible as possible – the prices are fixed so buying the day before doesn’t change the cost. The pace of our trip felt mellow to us. We took several rest days, and there were a few days when we waited out bad weather (we didn’t want to miss out on any views by crossing the passes in the clouds). Not everyone has the luxury of time, but if you do, the slow and flexible approach is definitely ideal.

Legendary Namche Bazar, by far the largest of the mountain villages along the Three Passes Trek, is uniquely situated in the terrain and makes for a fun place to spend time while acclimatizing.

Pastoral hills above Namche

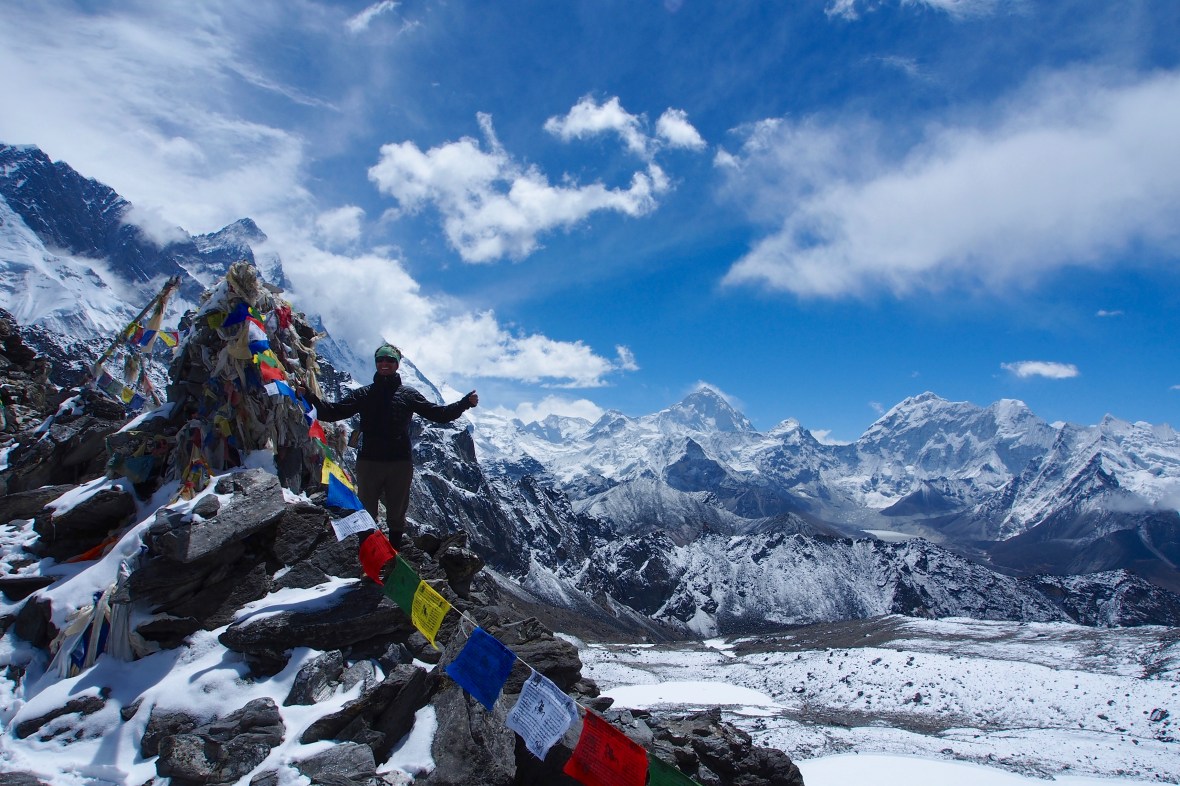
First sighting of the big peaks! The summit of Everest is peaking over the ridge on the left and Ama Dablam can be seen on the right.
Experience level: if you are an experienced hiker, you can absolutely do this trek without a guide; however, the seriousness of the trek should not be underestimated, and it is advised not to do it alone. We saw many inexperienced hikers who were out of their element and who had to turn back for various reasons. Be aware that the trek includes real elements of danger. The high altitude can lead to altitude sickness, which can be deadly. Rockfall is often a risk. There are also several glacier crossings, and although people seem to have a cavalier attitude about glacier crossings in Nepal, they are inherently dangerous. Additionally, 3rd or 4th class scrambling is required at times (climbing using hands and feet, where a fall could lead to injury or death). Lastly, the weather in the Himalaya is extreme, and you need to be prepared for sun, rain, snow, and extreme cold (in 2014, blizzard conditions resulted in the deaths of 43 people on the Annapurna Circuit). All that being said, this is a trek most people can do with some hiking experience. But, it is not a beginner hike and don’t expect it to go well if you haven’t backpacked before. As our German friend from the trail said, “People come here to learn how to hike… What are they thinking?… You can die here!”
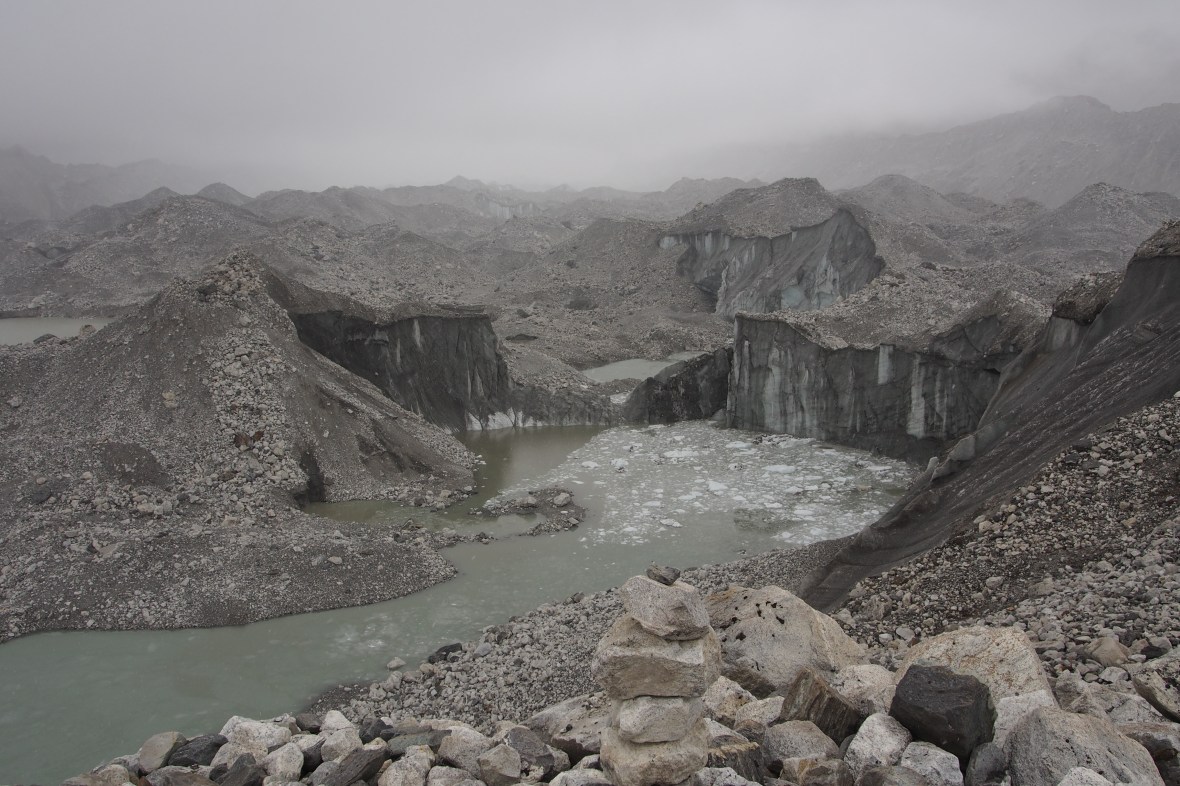
The lower sections of Himalayan glaciers often look like a war zone or the surface of some far away planet. Here’s a shot from the Ngozumpa glacier crossing in between Cho La and Gokyo.
Guides/Porters: Porters can be hired for about $10/day. They’re expected to just carry gear. Guides are $15 – $30/day and carry less gear, but they speak English and help with things like trip planning and booking tea houses. Most people we met doing the trek didn’t hire a porter or a guide. The entire route is supported by many teahouses, so your pack should be lighter on this trek than on a normal backpacking trip. But, if you want a lighter pack or the security of having a guide with you, there are many options. If you do hire someone, make sure to be very specific about the route, what is expected of them, and the price. One of our friends had an issue with their porter offering to help book teahouses. It turned out he was booking teahouses for 200 rupees and telling our friends that the cost was 400 rupees. Lesson – be clear about expectations upfront.


Acclimatization: The key is to go slow and give your body time to adapt to the altitude. Abide by the general rule of hike high, sleep low (use day hikes to expose your body to high elevation but return to a low elevation to sleep) and don’t sleep more than ~300 m (~1,000 ft) higher than you did the night before. Take rest days, especially if you are feeling fatigued or ill, and stay hydrated! Drink 3-4 liters of water/day and avoid alcohol. Know the symptoms of acute mountain sickness (AMS), high altitude cerebral edema (HACE), and high altitude pulmonary edema (HAPE), and understand what to do if you experience symptoms.
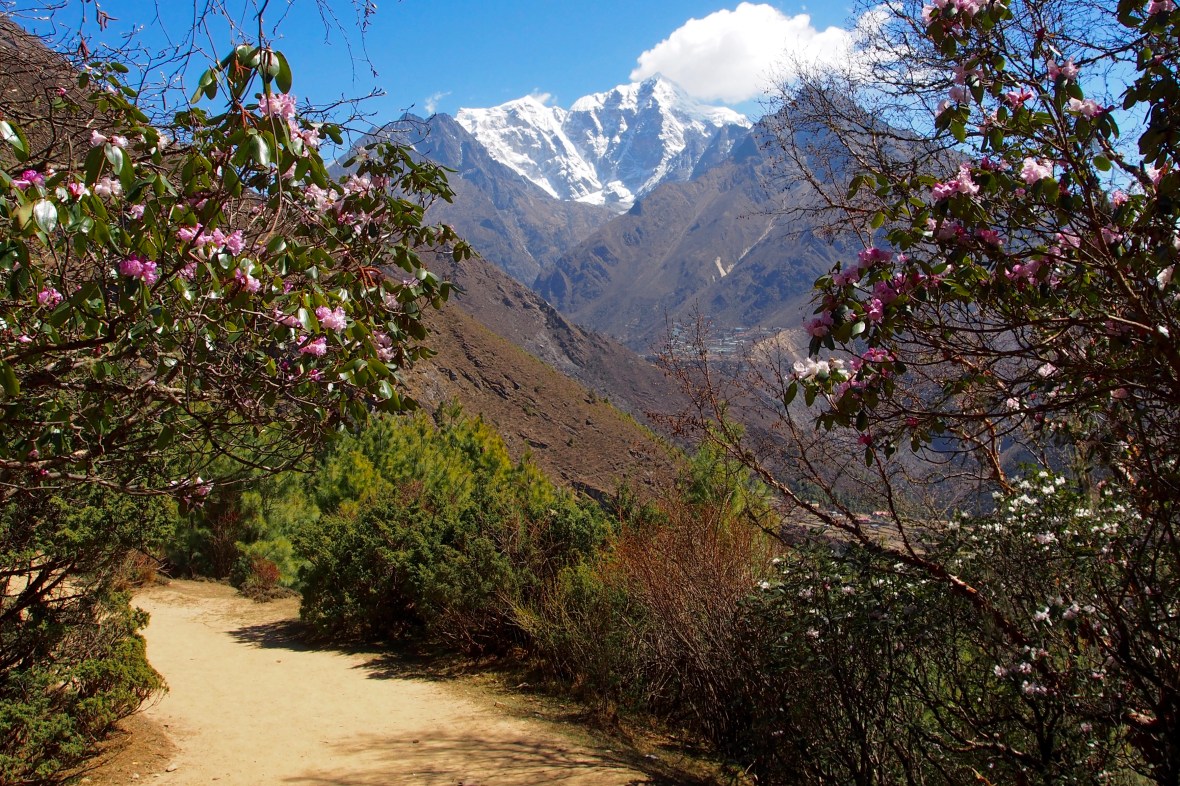
Blooming rhododendrons added spectacular color to the lower elevation scenery.

Bridges, prayer flags, and stone huts such as these are frequently seen from the trail.


Cost: We spent $44/day for the two of us, in addition to permit costs and flights. You can pick up your trekking permit (TIMS card) for $20 USD in Kathmandu (you’ll need two passport photos). The Sagarmatha National Park Entry Permit is an additional $30 USD. Expect to spend between $15 – $30 (USD) per person, per day depending on your budget. Prices go up the further you go into the trek because everything is being carried in by porters and yaks. At $44/day (for both of us), we were living comfortably and indulged in tea, plenty of food, and dessert most days. Lodging typically costs 100-500 rupees/night and meals cost between 200-800 rupees. Most teahouses have hot shower facilities (~500 rupees), wifi (~600 rupees), and battery charging (~100-500 rupees). Snacks, toiletries, and other (very) basic essentials will be available in most villages, but acquire all your gear/supplies in Kathmandu as prices will be higher in Namche Bazar and even higher in more remote villages. If there are specific items you need, do not count on being able to pick them up along the way. Lastly, bring cash from Kathmandu. There is an ATM in Namche Bazar but relying on it would be risky. Very few teahouses accept credit cards.
Kongma La – the first and highest pass of our trek at 5,535 m – is considered by many to be the most difficult of the three passes. The views were just incredible.
Route: We went counterclockwise and felt that this was the best way to go. There were people doing the trek in the other direction; however, each of the passes seemed like it would be more difficult this way given the steepness of ascent/descent and the degree of altitude changes. For what it’s worth, most guided treks also go this direction.
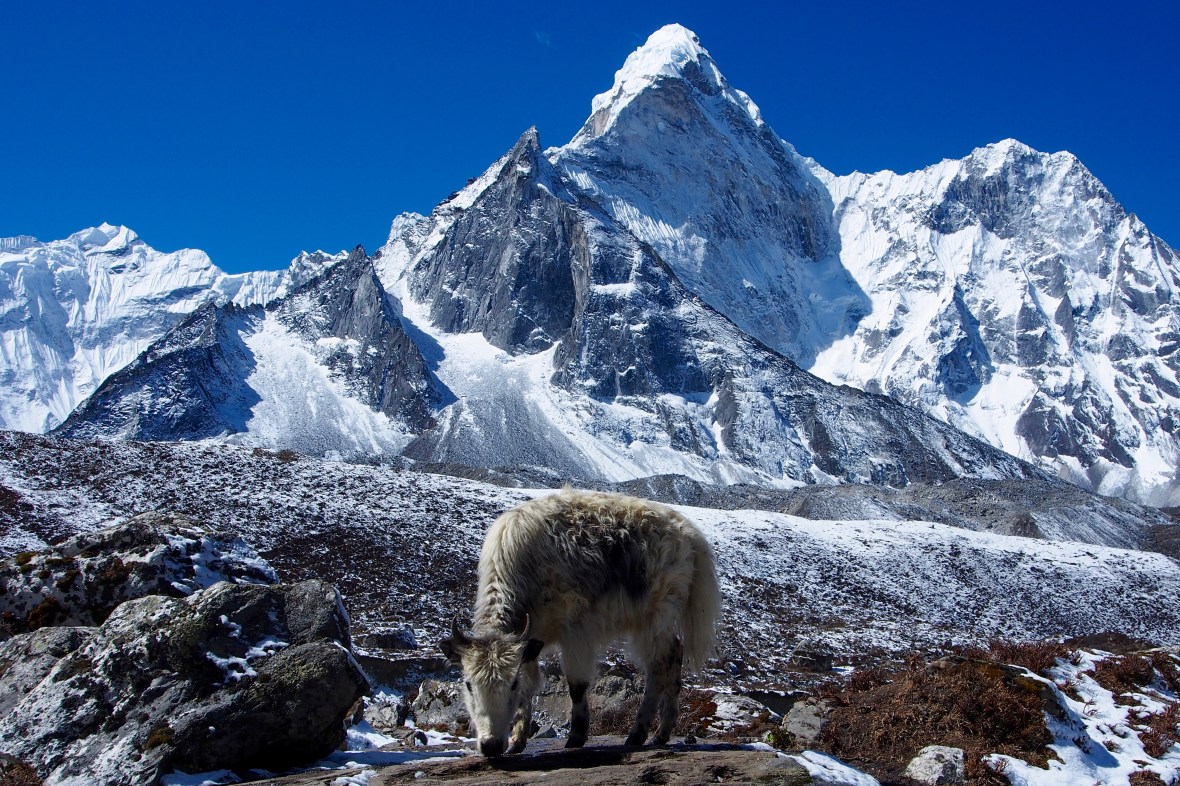
Ama Dablam and a young yak just outside of Chhukung
Route-finding: Route finding is easy on the main trails but can be challenging over the glaciers. At lower elevations (around Lukla and Namche Bazar), there are trail signs. There are not signs up at higher elevations, but navigating with a map is easy and in most places, there is only one trail to follow with few junctions. Over the passes, you must navigate more complex trails, sometimes using cairns and topographical awareness to guide your way. We heard several stories of people getting lost while trying to cross the high passes in the snow. Everyone on the trails can be a resource, so ask porters, guides, other trekkers for directions if you’re unsure.

The Khumbu icefall and glacier, Everest (center), and Nuptse (right) as seen from Kala Patthar
Season / Weather: The trek is notoriously crowded in October, the high season. We heard it can also be crowded in early/mid April. During our trek (April 28 – May 18), crowds were not much of an issue, especially outside of the Everest Base Camp trekking sections. The weather tended to be very good in the early mornings, with sun and clear blue skies. Clouds typically rolled in between 10am-2pm and often brought light snow or hail (rain at lower elevations). Occasionally, it cleared up again in the evening. There were a few days where several inches of snow accumulated and visibility was poor all day. Give yourself lots of time so that you don’t have to trek in poor weather.
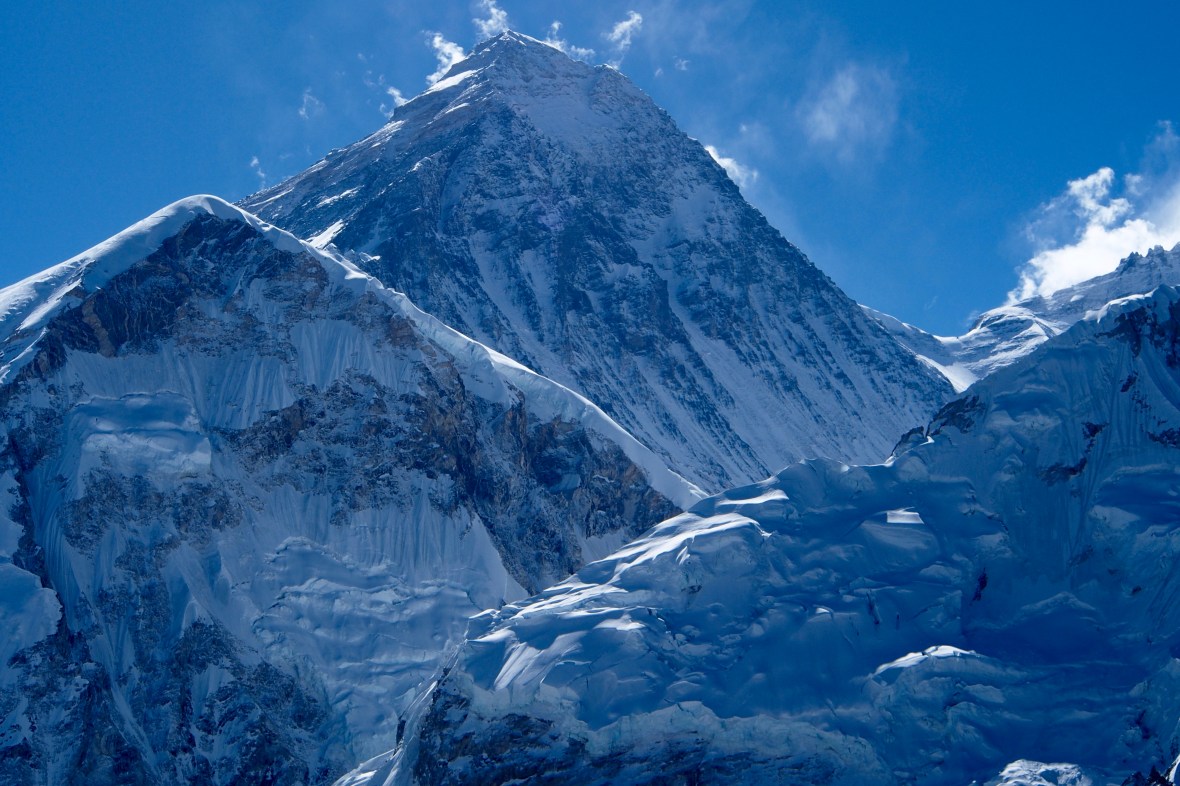
Everest and the south col as seen from Kala Patthar at 5,643 m
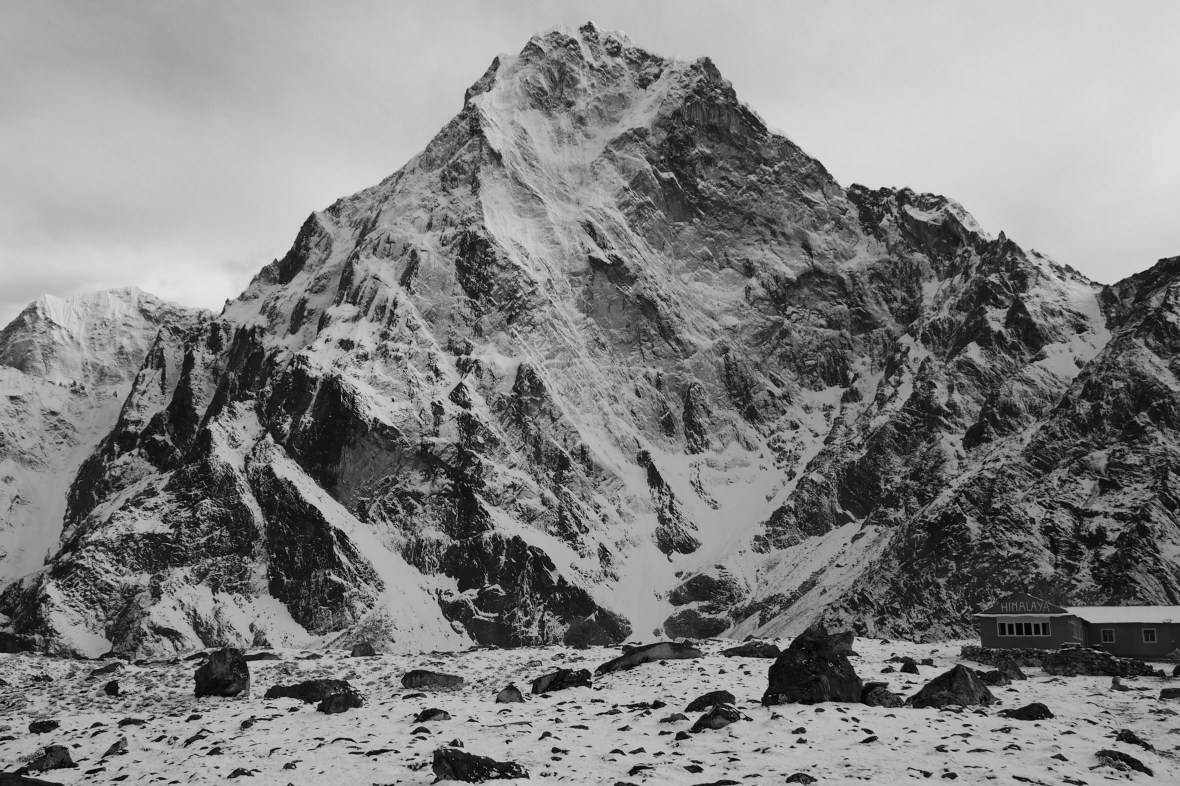
Everest Base Camp (EBC): Be aware that sections of the Three Passes Trek overlap with the EBC trek, and these areas will be crowded. This was an annoyance to us, but not a serious problem. In Gorak Shep, there are just 4 lodges and a bottleneck of people, so it would be wise to ask your teahouse in Lobuche to call ahead and make you a reservation for a teahouse in Gorak Shep (we’d recommend the Himalayan Lodge – the first one as you enter Gorak Shep).
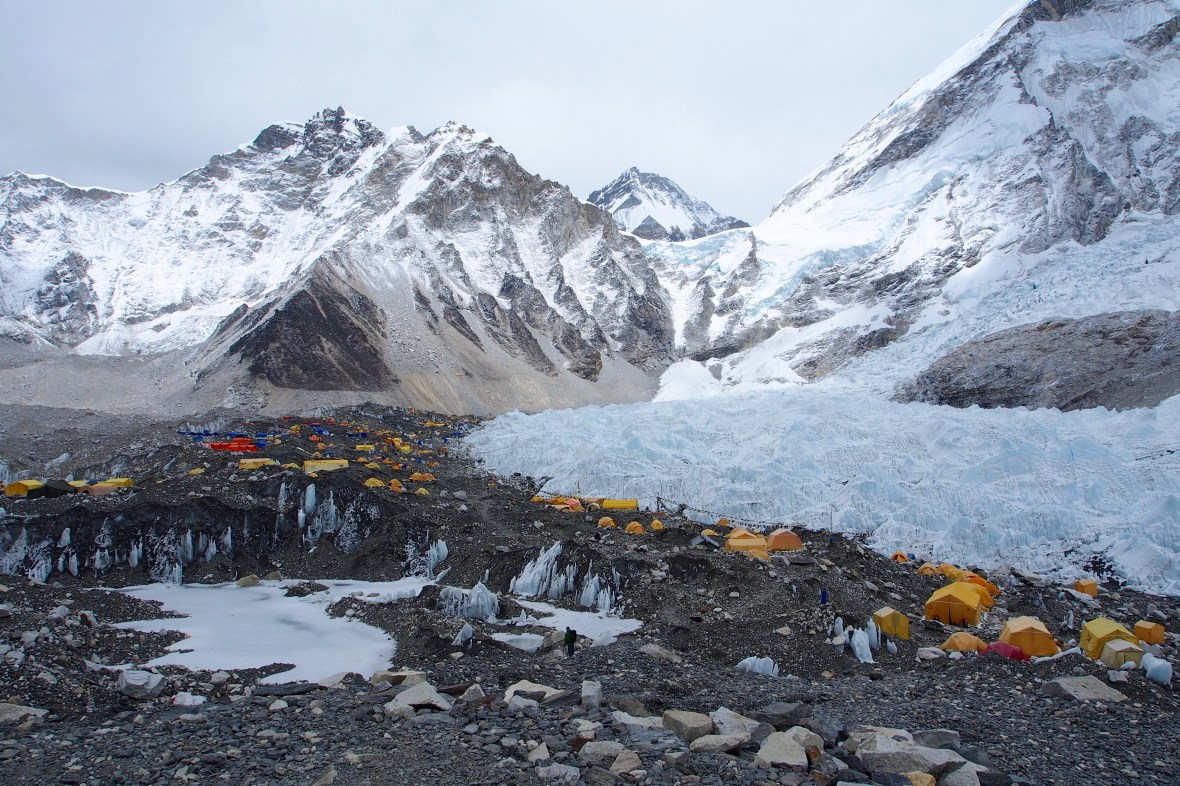
Everest Base Camp (EBC) sits beneath the infamous Khumbu icefall and glacier.
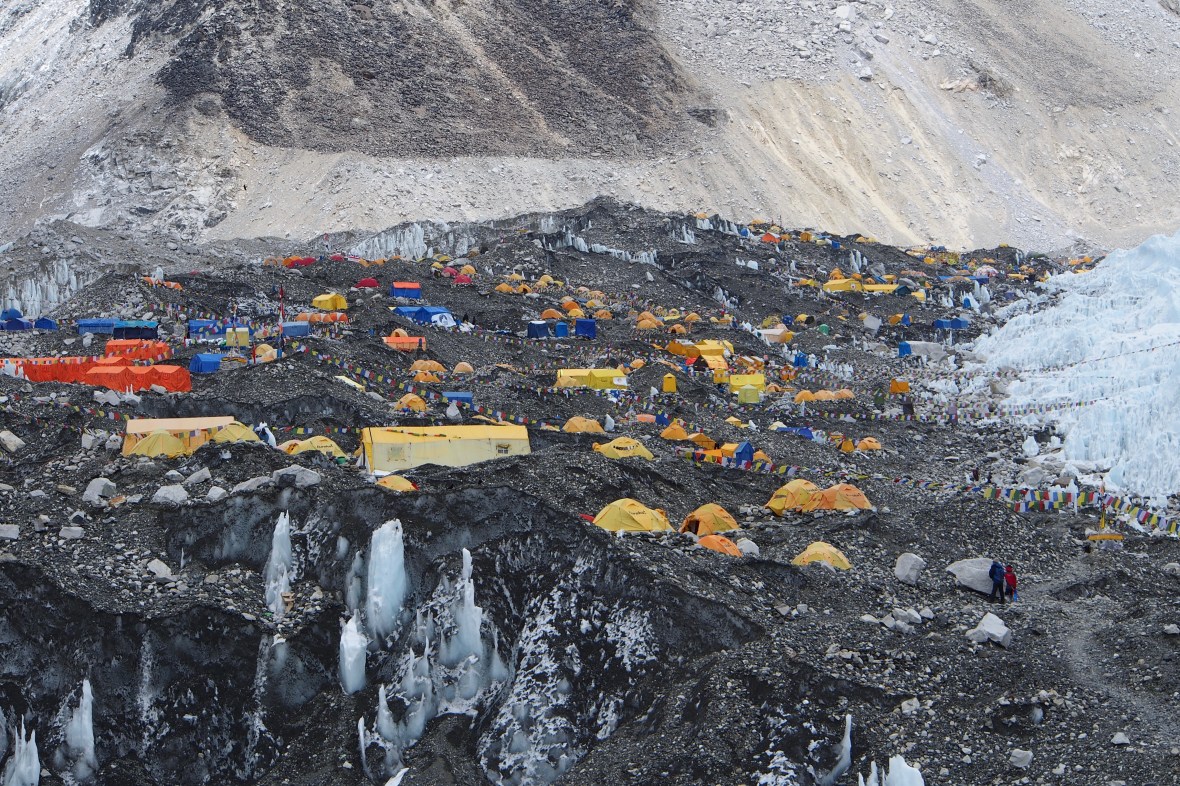
In the busy May climbing season, EBC is a bustling village.
Language: Most of the Nepali people we encountered along the trek spoke some English, but we both took the time to learn a little Nepali, and this went a long way. For instance, Connor was invited to join a group of Sherpa for tea after engaging them in conversation in Nepali. Everyone greets one another with “Namaste!”, but it’s easy and fun to learn more phrases like “kasto cha?” (how are you?) “thik cha” (I’m good), “dhanybhad” (thank you), “subha din” (have a good day), and “kahaang jane?” (where are you going?). We found the local people along the trek to be incredibly warm and welcoming.

Ama Dablam and an almost full moon from Dzongla on a rare clear evening after a snowstorm
Water: We used an MSR Autoflow Gravity water filter for the trek and brought water treatment pills as a backup. Many people use chlorine pills exclusively and many others used UV water treatment systems – these methods seemed to work fine as well. You can also buy treated or boiled water from the teahouses, although this gets costly. Whatever you do, don’t be lazy and rely on plastic bottled water (which sadly, is available throughout the trek). It’s crazy that porters carry bottled water up the long trail to a place that has some of the purest glacier water on the planet… And then of course, they carry the plastic bottle back down for you in the form of trash. Just don’t.
We were stuck in Dzongla for a while waiting out some bad whether. This allowed time for some creative photography and a lot of card games.
Lodging: The beauty of trekking in Nepal is that it is supported – you don’t have to bring your own food or tent! It is the glamping version of through hiking. You can choose to bring a tent, sleeping pad, stove, etc. and do it the hard way, but 99.9% of people do not. Chances are, when it is below zero and snowing outside, you’re going to wish that you were inside a teahouse around a fire with a hot meal. Teahouses are seriously affordable (100-500 rupees for a room) and sometimes free as long as you eat your meals there. Teahouses are also a great way to meet other trekkers and get closer to the Nepali and Sherpa cultures. They are typically run by families who are willing to share their stories with you if you are curious enough to ask. All teahouses provide a bed and extra blankets (no sleeping pad needed). The rooms will be unheated and at times extremely cold. During the high season (October), the teahouses can become crowded such that there are not rooms available and people sleep in the teahouse common rooms, but this was never the case for us. All teahouses will have toilets and some form of “sink”, although the condition of these amenities is highly variable (it is BYOTP – toilet paper not provided).


Food: In general, all of the teahouses have the same menu and a surprising variety of food options. The quality of the food was generally great, with only a few exceptions. There are egg dishes, toast, potatoes, and muesli available for breakfast. For lunch and dinner, there are sandwiches, soups, spring rolls, curries, yak steaks or burgers, pizza, momos (dumplings), and of course dal bhat (rice and lentils). Dal bhat, the staple dish of Nepali cuisine, always comes with a side of curried vegetables and free refills (no joke), so if you’re hungry, it’s often the best bang for your buck. Most teahouses also offer apple pie and other desserts. There are a variety of teas available as well as coffee, sodas, and juices. Beer, wine, and liquor are also often available but are quite pricey. *Tip – bring a few pounds of snacks – you’ll save money and your pack will get lighter over the course of the trip. Per person, we recommend: 1 lbs nuts, 5 snickers/bars, 1-2 lbs chocolate, and powdered drinks (such as Emergen-C, gatorade, tea, etc.)
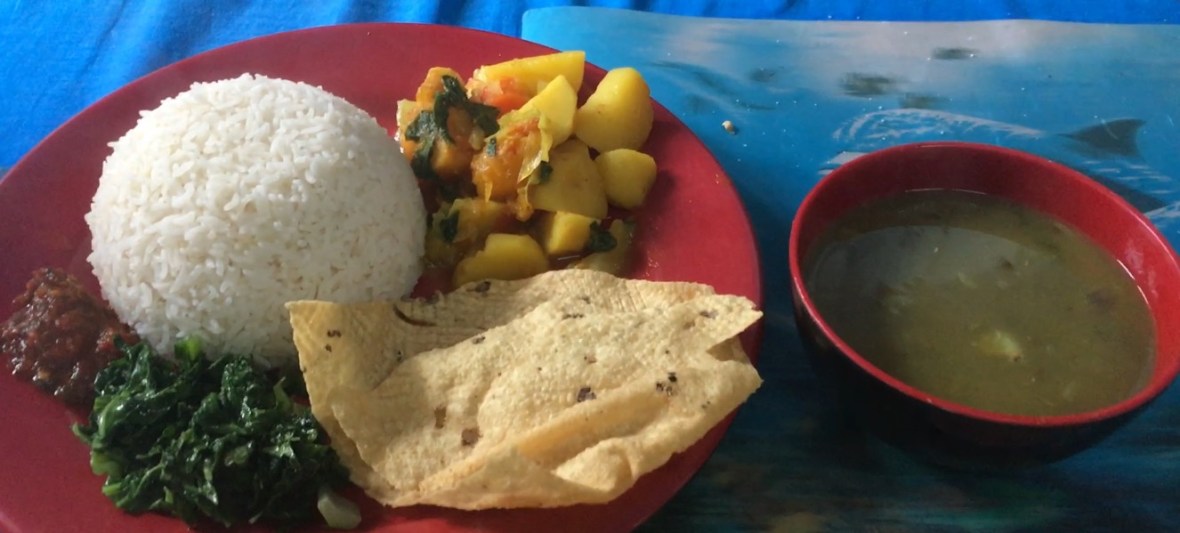
Typical Nepali dal bhat set
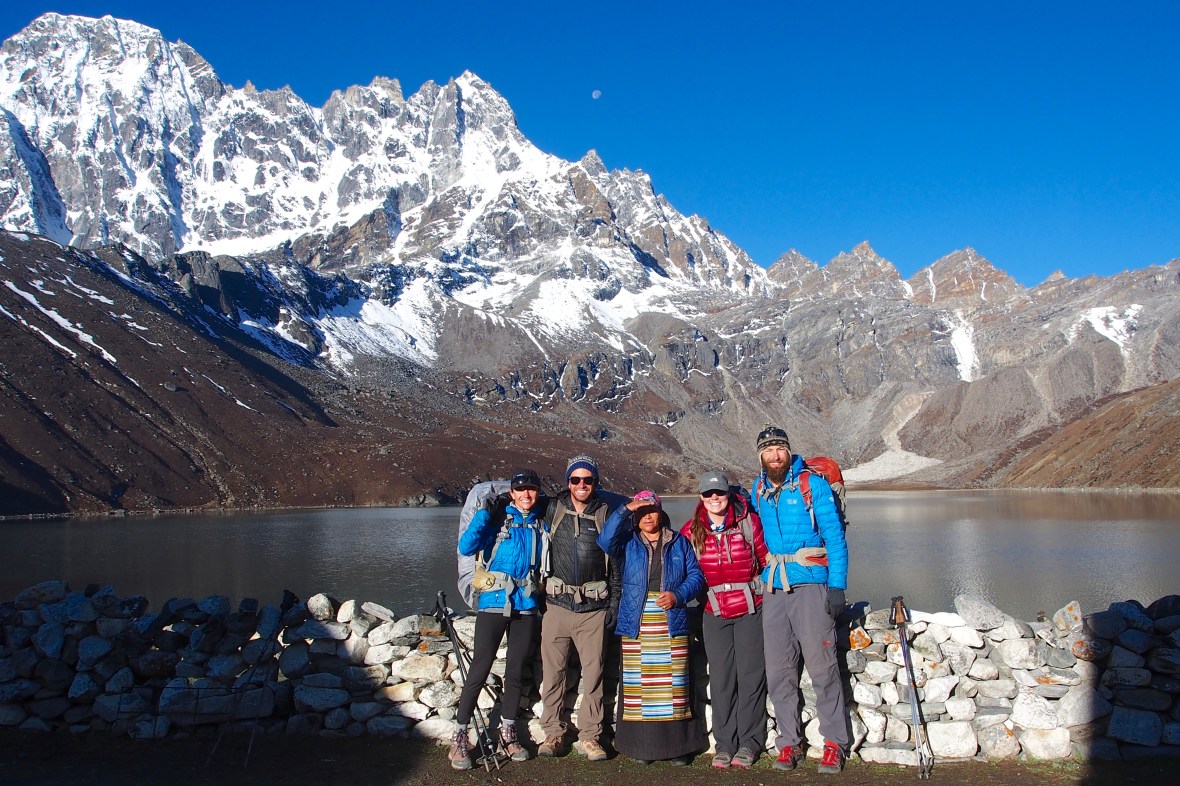
It was hard to say goodbye to our favorite teahouse host, Dali, and our favorite village, Gokyo. If you visit Dali at the Cho Oyu View Lodge, make sure to try her famous spring rolls. Best food and hospitality we had on the trek. Thanks, Dali!
Flora/Fauna: There was an abundance of wildflowers during our late April – mid May trek. The rhododendrons were particularly striking. Trains of adorable yaks and mules are used to shuttle gear and garbage up and down the villages. You can also see pica, eagles and a wide variety of other beautiful birds, and tahr, a Himalayan mammal that looks like a cross between a deer and a goat. Maybe a yeti if you’re lucky.
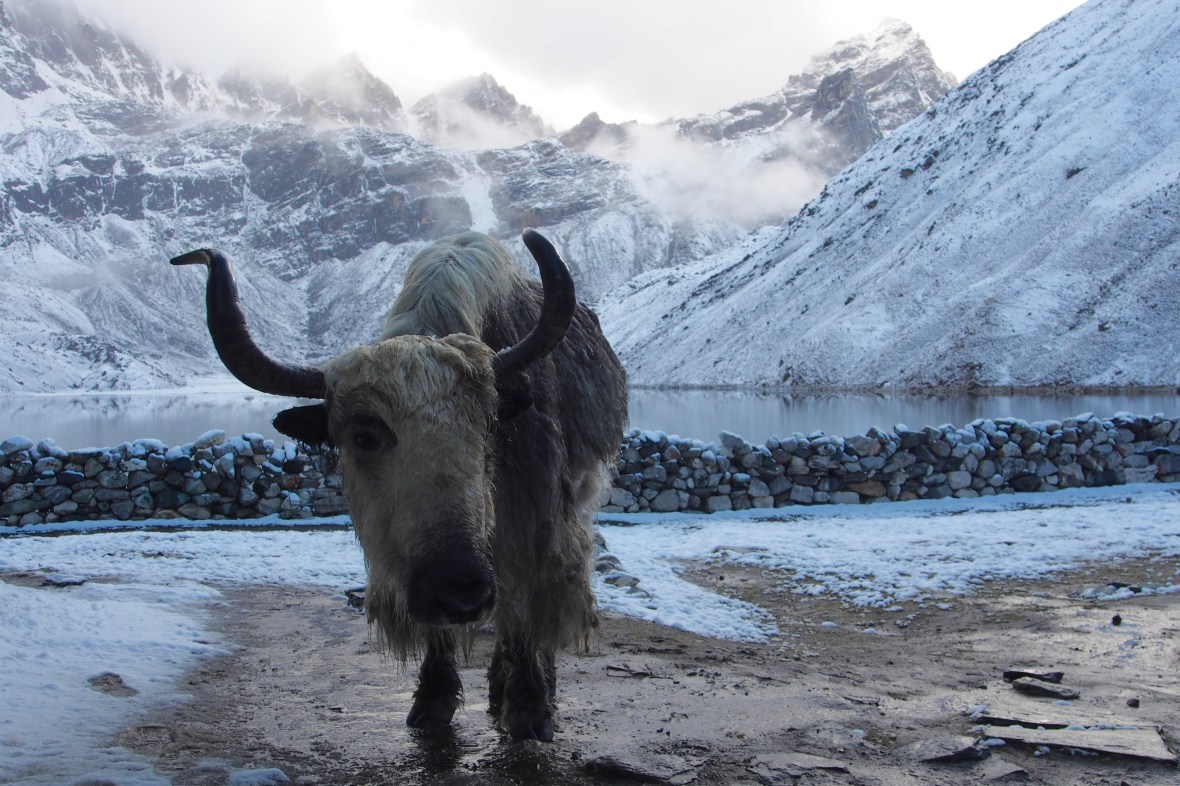
This 20-year-old yak, affectionately known as Garson, was extremely photogenic.
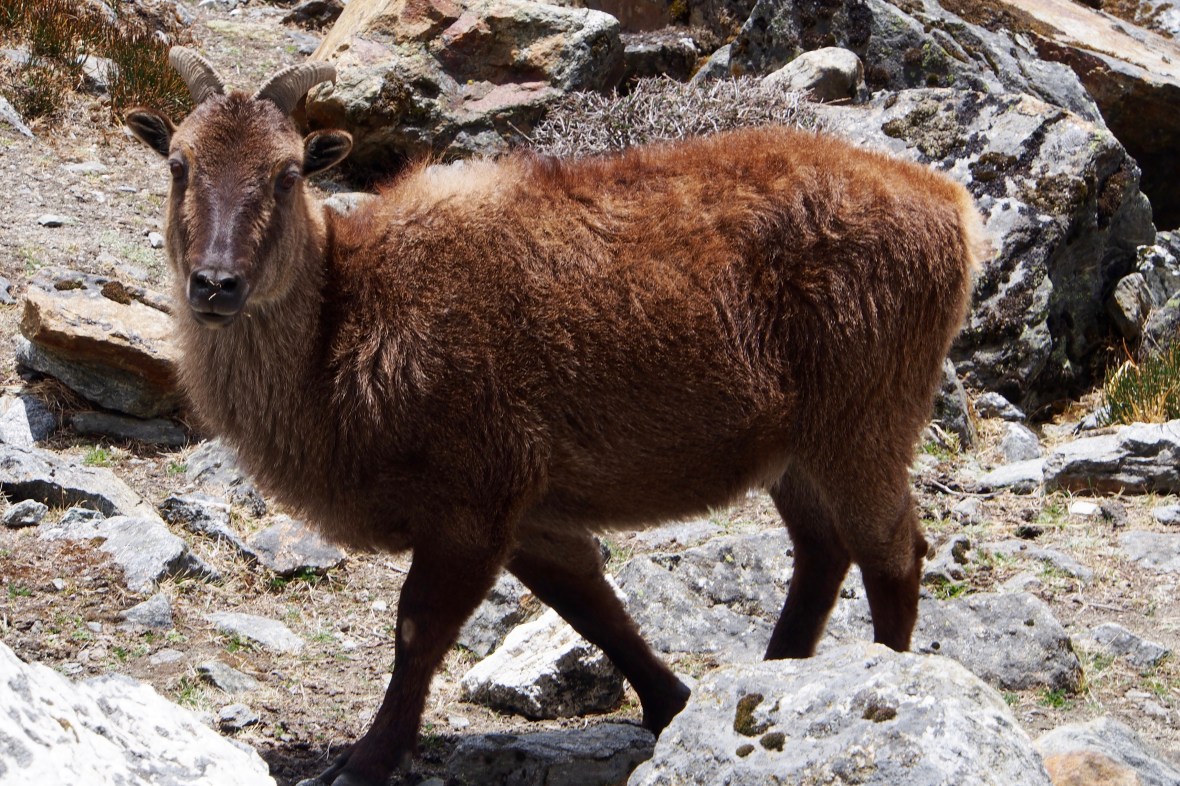
Himalayan Tahr

During our trek, volunteers went through the villages spaying/neutering the strays. To distinguish animals that had been fixed, they painted their faces, warrior style.
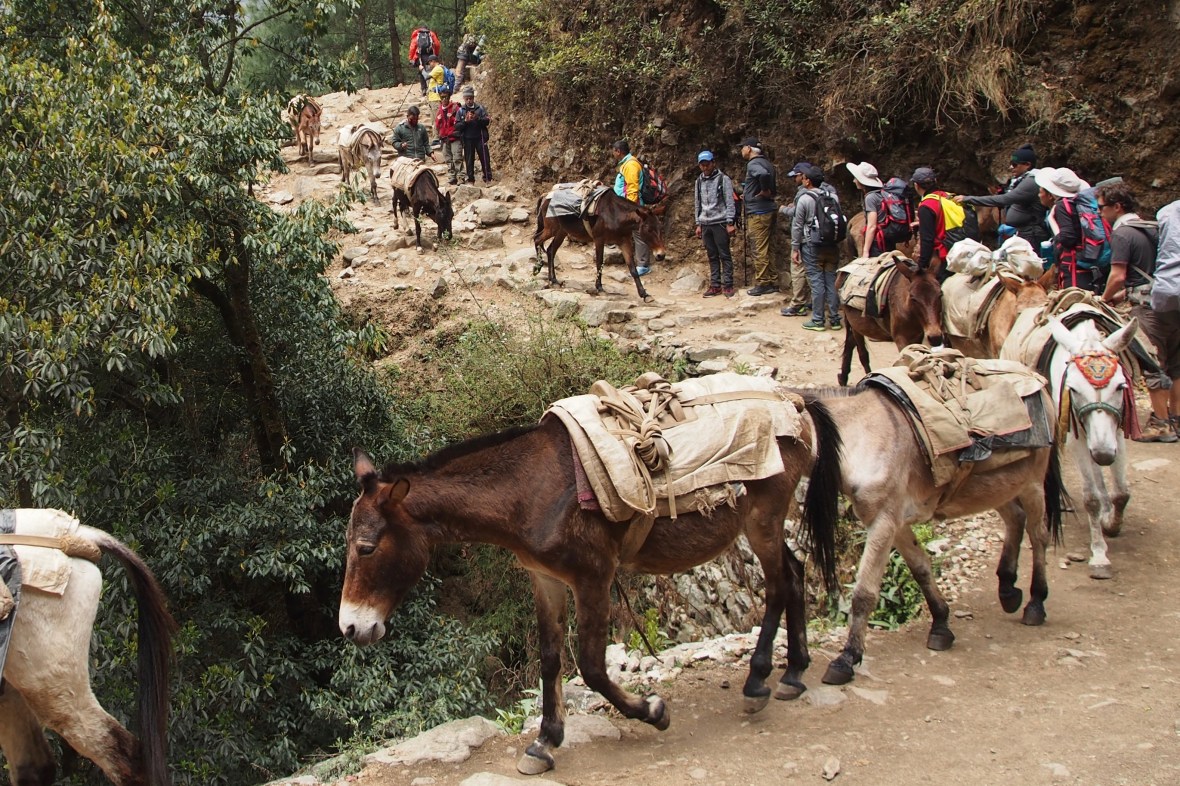
Trail Traffic
Emergencies: All villages have the ability to call helicopters for emergency evacuations. Apparently you can also snag a heli if you just want to quit and you have a big budget. We literally watched a group request a heli ride out because they were tired (they paid over the phone via credit card and were gone in 30 minutes). The availability of these services is weather dependent of course. Some of the villages have medical clinics, but if you’re seriously ill or hurt, you’ll probably want to descend or get an evacuation out. There are also “horses for hire” if you are unable to walk out but don’t want to spring for a heli ride. Most teahouses have wifi available for a price if you need to communicate with someone or use the web. Make sure to check that your travel insurance covers you above 5,000 meters – we’ve heard of people having issues with insurance companies because trekkers went “above” their plan.
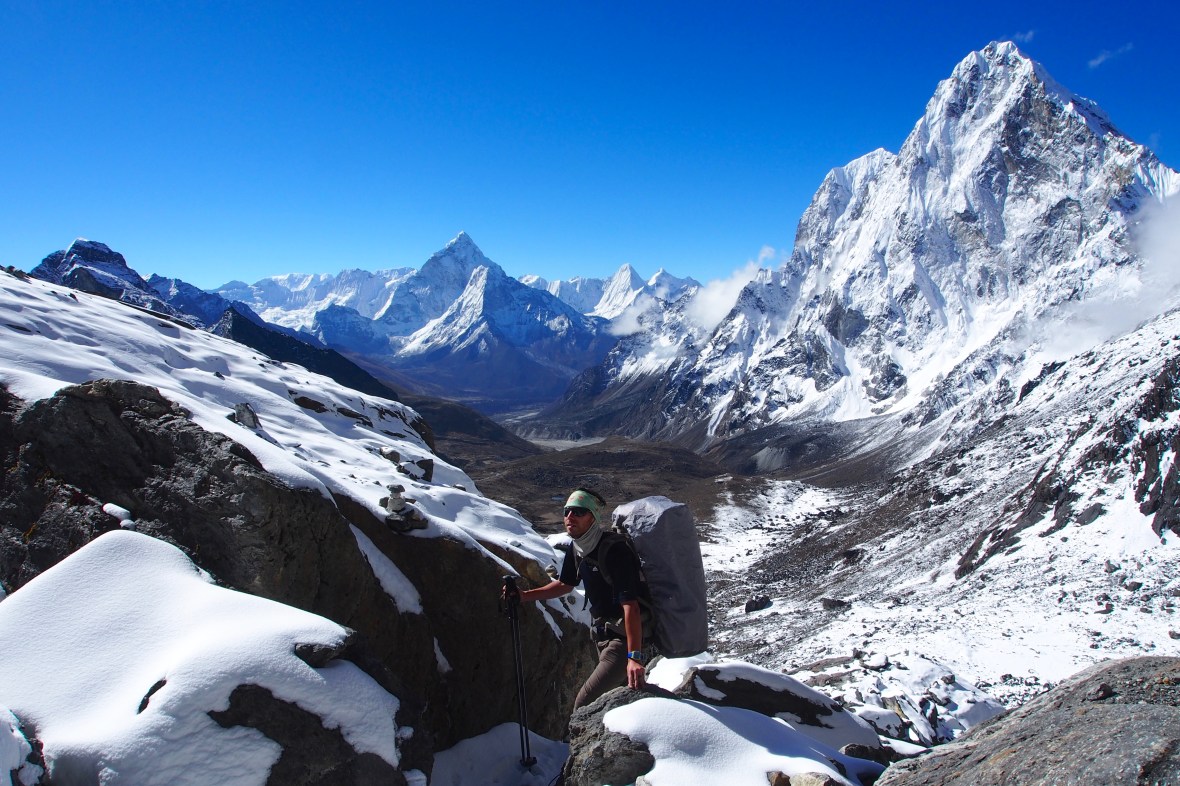
Cho La (5,420 m), the second of the three passes, was probably our favorite. These views were worth the wait we endured in Dzongla while bad weather passed through.
Approach: The majority of trekkers fly into and out of Lukla. Flights are $150 each way, but are dependent on good weather. Try to book the first flight in the morning if possible, when the weather tends to be best. You can also take a bus (~8 hrs) from Kathmandu to Jiri Bazar or Salleri, and begin your trek at a lower elevation. This is a great way to improve acclimatization and to visit the “less touristy” villages of Nepal. If you opt to start lower, you’ll experience warmer temperatures, quieter trails, and cheaper accommodations.
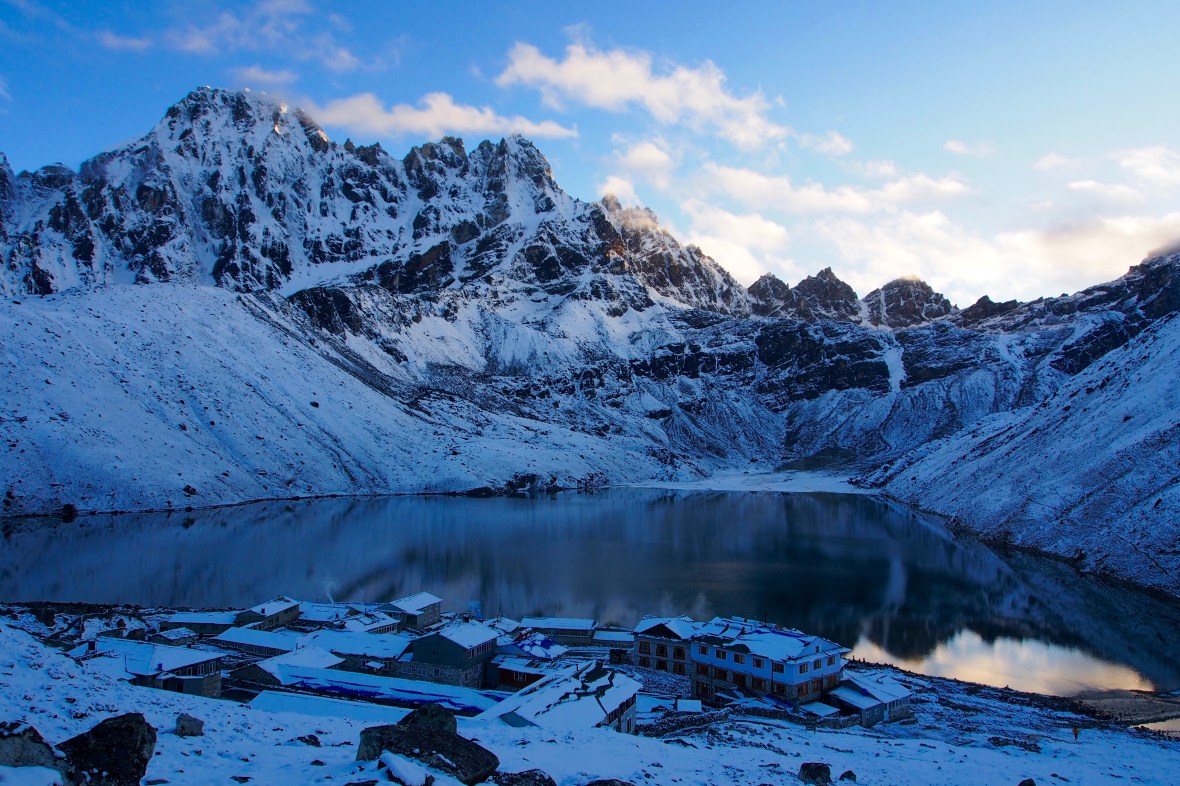
It’s easy to see why Gokyo was our favorite village on the trek. Don’t miss it.
Climbing Culture: If you want to summit a “trekking peak”, you’re required by the Nepal Mountaineering Association to pay a guide and acquire a permit (e.g., Island Peak, Mera Peak). This gets pricey. Most people arrange for this ahead of time and the costs are included in a package deal with a guiding company. However, it is possible to find guides and permits for the smaller trekking peaks once you are on the trek (e.g., Lobuche East, Pokalde, possibly others). We found that you could climb Pokalde for ~$350 USD and Lobuche East for ~$500 USD, which includes guides, porters, fixed ropes, and gear (tent, sleeping bag, and prepared meals for high camp, harness, etc.), all of which are required if you want to climb a peak above 6000 m. While it was tempting to tag a higher summit, we decided that it didn’t really suit our climbing style. Perhaps in the future.
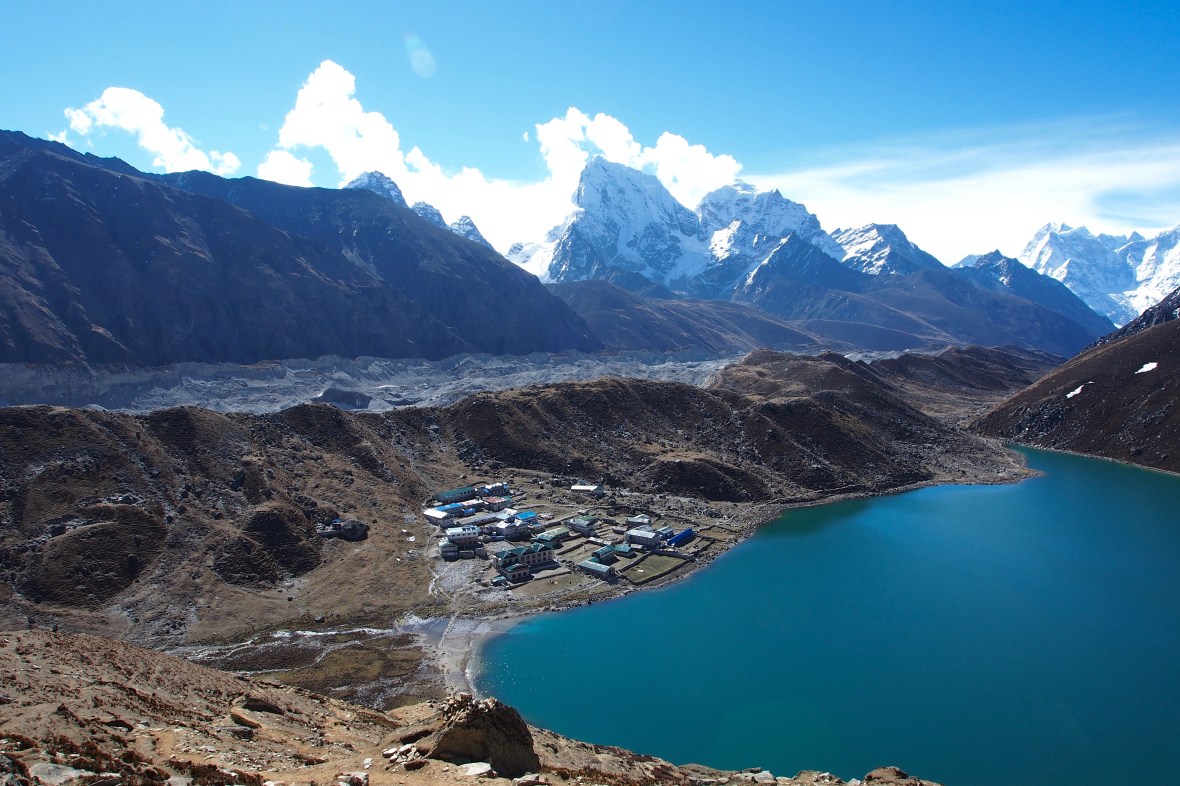
View of Gokyo from the hike to Gokyo Ri
Three Passes Trek Packing List: Thamel is the tourist district of Kathmandu, and from any given corner, you can literally see 5-15 gear shops. Since we came from two months in southeast Asia, we had to acquire most of our cold weather gear upon our arrival. Two days was the perfect amount of time to make this process enjoyable and stress free. Most of the gear shops have an assortment of cheap gear made in China, but there are also genuine Northface and Mountain Hardwear shops in Kathmandu where you can get the real thing (for the real price). We found that the cheap Northfake gear held up just fine, and if you spend some time bargaining, you can walk away with some decent gear for a killer price. However, don’t expect to find a ton of variety – all of the shops pretty much carry the same stuff, and you won’t find all of the nice gear that you might elsewhere. For instance, they didn’t have much for wool base layers. Extra gear that you don’t need on your trek can be left with your hotel in Kathmandu. Your gear is likely to remain safe, particularly if you assure your hotel that you’ll stay with them again when you return. We had a great experience with Hotel Bright Star.
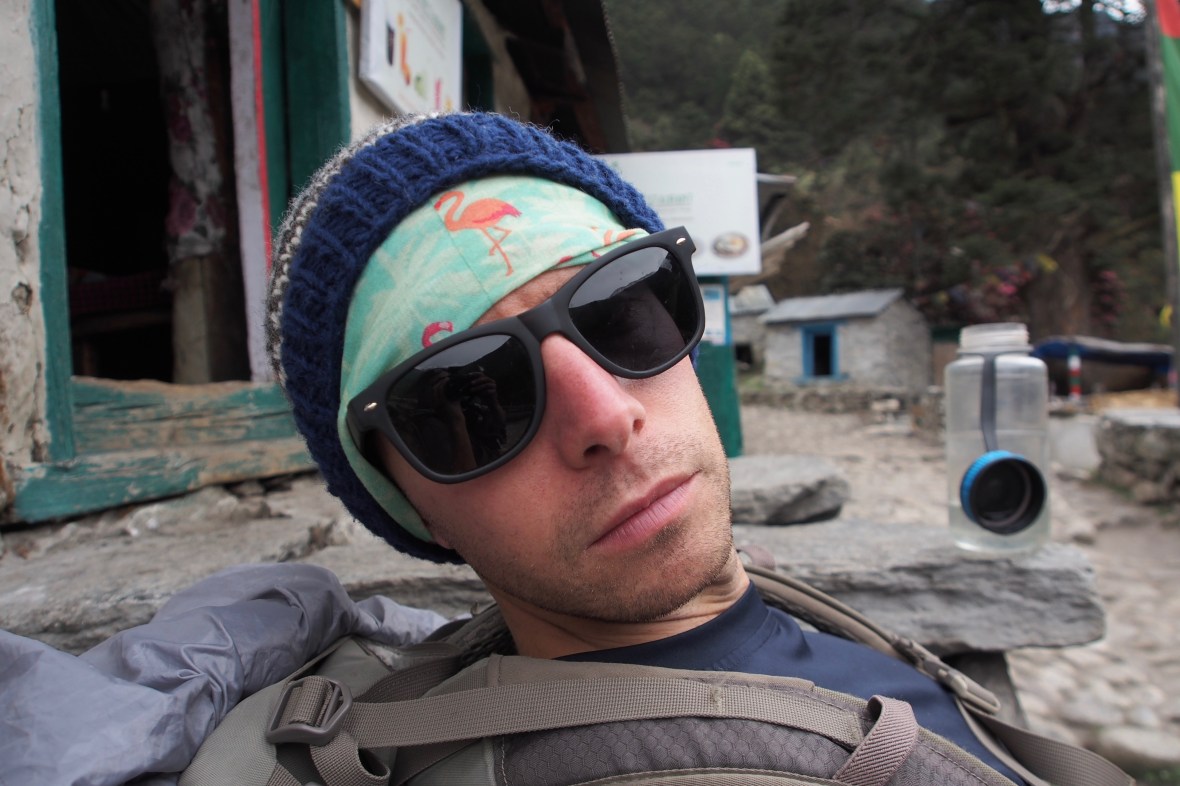
We take our trekking gear very seriously. Flamingos and all.
Here is a list of everything we brought on the trek (some gear from home, most from Kathmandu), and few things we wish we would have brought (per person):
- Down sleeping bags: -10 for her, -5 for him (we both could have used warmer bags, but all of the teahouses provide extra blankets, which we used often)
- Cocoon sleeping bag liner (1)
- Down jacket (1)
- Gortex rain shell jacket (1)
- Waterproof backpack cover (1)
- Beanie (1)
- Buff/bandana (2) – keep dust out of your mouth, sun off your neck, and more
- Scarf
- Lightweight hiking pants (1) – you do not need soft shell or heavy hiking pants
- Warm, comfy pants to wear in teahouses and for sleeping (1)
- Short sleeve hiking t-shirt (1-2)
- Long sleeve hiking shirt (1)
- Base layer bottoms for layering warmth (1-2)
- Base layer top for layering warmth (1)
- Warm long sleeve top for teahouses/sleeping (1)
- ~5 pair socks
- ~2-5 pair underwear
- Sunglasses
- Hiking boots
- Sandals
- Shampoo, lotion, chapstick, toothpaste/brush, toilet paper, hand sanitizer, soap, baby powder, baby wipes (50 each – we use 2-3 after a long day of hiking for a quick rinse)
- Sunscreen
- 4 lbs food – Snickers, peanuts, chocolates, hydration salts
- Water bottle – 1 liter Nalgene or stainless steel (stainless steel is nice since it can be used to heat on the teahouse stoves for warm water)
- Travel towel
- Trekking poles
- Emergency kit: ibuprofen and opiate painkillers, diamox, cortisone cream, antibiotic ointment, prescription antibiotics, antiparasitics, bandages/medical tape, water treatment tablets, treatment for any other conditions to which you may be prone (do not count on being able to find anything at the pharmacies in Nepal)
- Duct tape and zip ties for repairs
- MSR Autoflow Gravity water filter
- Small 15 L daypack for day hiking (probably unnecessary but nice to have)
- Map
- Headlamp with charger and/or extra batteries
- Deck of cards (most days you’re done hiking before noon – lots of down time)
- Earplugs
- iPhone and charger
- Microspikes (many people do the trek without these but we found them useful – we used them on two of the three passes and also on Chhukung Ri on a icy/snowy day)
- Small combination lock, helpful for teahouse rooms so you won’t have to keep track of room keys
- Journal & pen
- Olympus OM-D E-M5 Camera with extra battery, extra memory card, and battery charger
- Kindle with charger
- Sleeping pads – we literally did not use these a single time (do not bring)
- SIM card for iPhone – someone suggested we buy a SIM card for emergencies, but the data didn’t work at all on the trek. Save your money and just rely on wifi.
- We recommend bringing old/flu medicine such as decongestant, throat lozenges, Emergen-C, cough medicine, and/or DayQuil/NyQuil. MANY of the locals and hikers around us were sick with cold/flu symptoms, and you cannot find this stuff in teahouses or stores along the trek. Yuck.
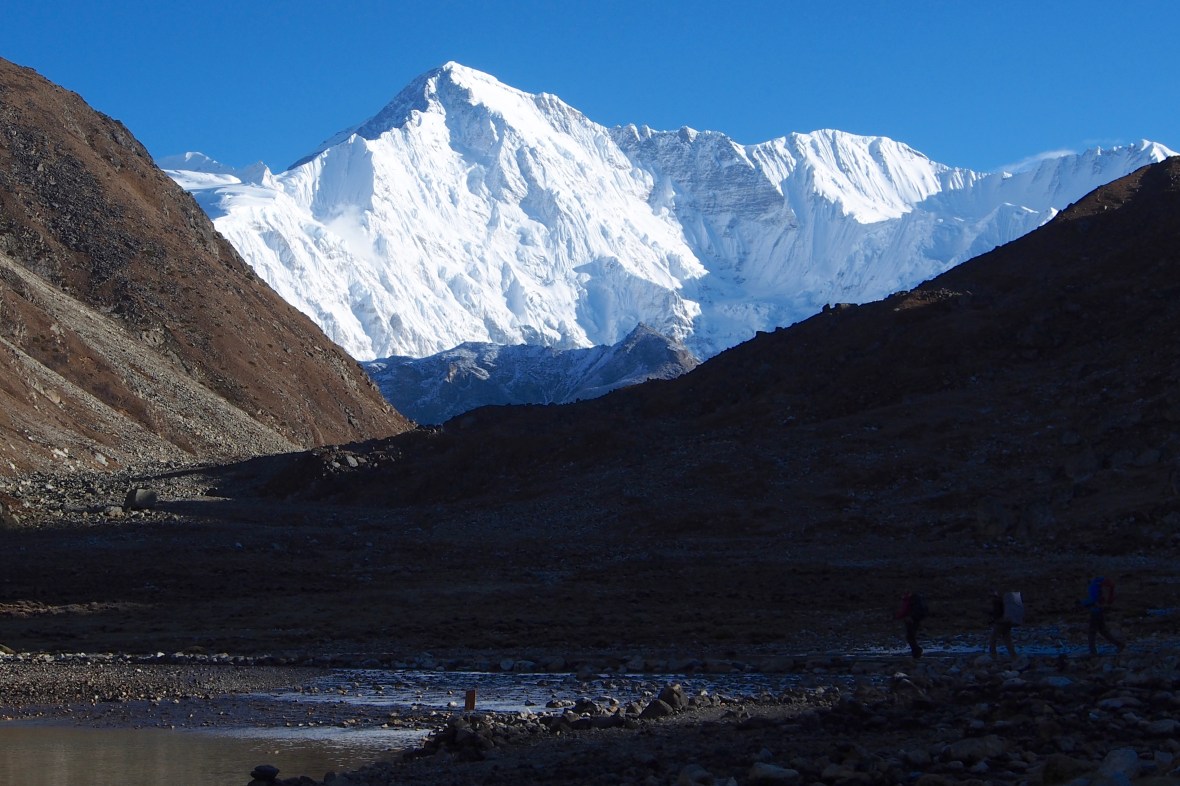
Cho Oyu looking glorious in the early morning light as we left Gokyo for Renjo La
Trekking Quick Tips:
- Be bold, start cold – i.e., start with fewer layers than you think you need, you’ll warm up quickly.
- Sunscreen early! You can get burned quickly at altitude, even in the morning.
- Hike slow! Find your sustainable pace, don’t worry about the porters passing you, they’re superhuman.
- Snack and hydrate hourly. A consistent mix of water and food will allow you go to all day – we’ve learned this from mountaineering. Keep snacks in your pockets for easy access.
- Start early: order breakfast before the big groups, hike before the dust gets kicked up, the sun comes out, and the storms arrive, and find a lodge by 2 or 3 pm at the latest.
- Upon arrival at a lodge – immediately take a baby wipe shower (while you’re still warm) and change into your clean teahouse clothes.
- After dinner, brush teeth then return to the fire to get warm before bed. If it’s really cold, fill Nalgene with boiling water, seal tightly (this step is important), put in sleeping bag.
- If you can make it to Monjo your first day, the next day to Namche with be much easier, and it’s less crowded than Phakding.
- Learn some Nepali. We found this helpful site: http://the-voyagers.tripod.com/language.htm
- Get to know the teahouse family – many of them are owned by Sherpa who’ve climbed Everest (sometimes more than 5 or 10 times) and other 8,000 m peaks.
- When you encounter a stupa, structures used for buddhist meditation, it is tradition to walk to the left of it (clockwise).

Traditional Buddhist stupa such as this one are seen often along the trek and are used for meditation. Walk around them to the left in accordance with traditional practices.
- Eat – as much as you can. Protein becomes harder to find the higher you go, and the meat less fresh, so we relied on a lot of eggs. Consider bringing protein powder if you want to retain weight.
- Only hike when it’s clear. In 21, days we only hiked in clouds twice, both times it was clear when we started and then weather moved in. Why hike over a great mountain pass with no visibility? You’ll risk getting lost or injured, and you’ll be missing the views of the highest peaks in the world.
- Unplug! Yes, there is wifi and you can charge all your devices, which is totally great, but there is a lot of value in being disconnected. Embrace it and just see what happens. Don’t be the abrasive New Yorker who storms into the teahouse demanding wifi, a battery charge, and a cappuccino (yes, this happened).
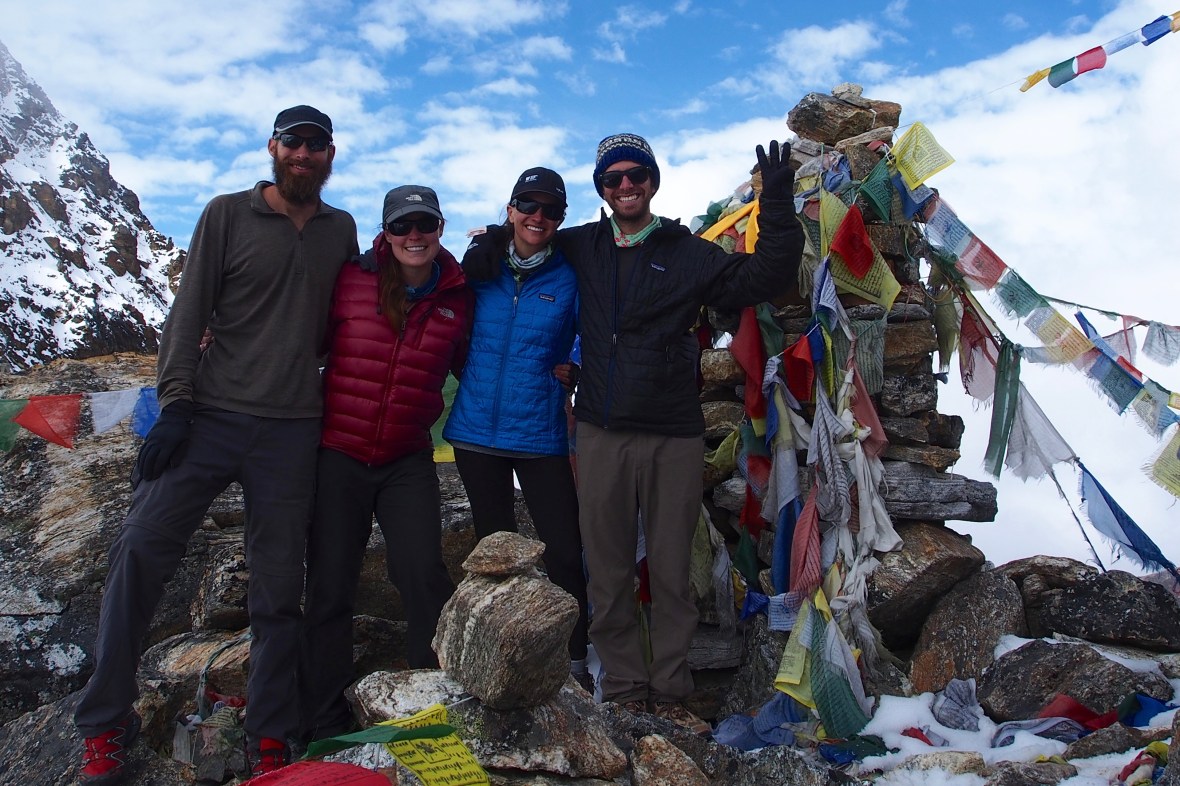
Renjo La (5,345 m) – the last of the three passes! Mission accomplished, and then some.
The Three Passes Trek was the truly experience of a lifetime. Unquestionably the most beautiful hiking we’ve ever done with the most awe-inspiring views and some unforgettable people. The sheer magnitude of these mountains leaves one at a loss for words. It literally takes your breath away. There is something supremely holy and spiritual about this place that is hard to articulate but that once felt, won’t be forgotten.

Three Passes – check!
If you have any questions about Nepal or our trek, shoot us a comment/message. We’d be happy to share more about our experience with you. Namaste!
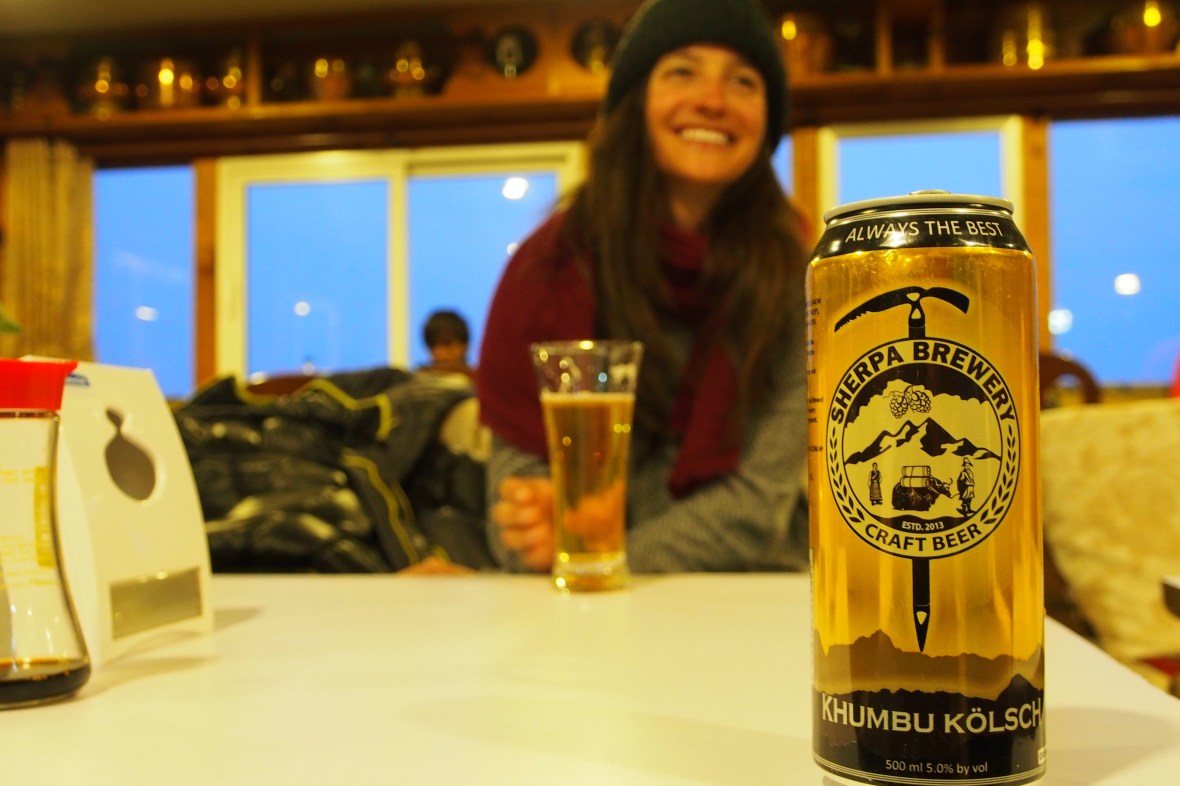
Celebration time! Enjoying a Sherpa Brew in Namche on our way out. Delish!

Wow! What an adventure! Loved reading about your treks in Nepal! Great that you’re sharing this way. Thank you! Living vicariously through you guys! I’m about to have a baby in 1 month, much different adventure:-)
Thanks for reading and following along with us! So excited for you guys and your upcoming big adventure! 🙂
Hi Sweeties, Absolutely fascinating commentary and video!! Can’t say enough about it all. Except—Connor what happened to your beard? We expected to see not only a man bun on you but a face bun as well by this time!! Sara, you look beautiful as always. Not an ounce of extra fat on either of you. A great adventure, but so scary to watch. Keep safe. Love, Gma and Papa
Thanks for reading/watching Gma & Papa! Connor has been trimming his beard in between adventures to keep it under control but both his beard and his hair are pretty wild right now. Kinda like Tom Hanks in Castaway… Ha! Hair is almost to man bun length, I’ll send pictures when it’s there 🙂
We’re having the best time! We miss you both dearly! Sending lots of love to you and the rest of the fam! xoxo
PS- Happy birthday Papa!! Wish we could be there to celebrate with you!!
This is all fantastic. I love it. It made me so happy to watch this video and read this and see these pictures.
Thanks for reading/watching, Justin! We miss you!!
Did you take your full packs with you on day 5 and did you find it overly strenuous? We were planning on doing Pangboche to Ana Dablam base camp and leaving our packs at the teahouse and only taking a day pack/doing a second night in Pangboche. However, getting to Dingboche same day is infinitely more appealing supplying us with another flex day in our itinerary.
We’re fairly fit and just did the Annapurna Circuit last year so experienced at altitude…just wondering if you did everything on that day relatively easily with full packs or if you made some sort of arrangement with your teahouse to pick up packs on the way out to Dinboche?
Great post and video! Thanks!
Hi Tracy!
Thanks for reading/watching! On day 5, we left our packs at the Trekker’s Holiday Inn in Upper Pangboche, went to Ama Dablam Base Camp and then back to the teahouse in Pangboche to grab our bags (this took about five hours round trip moving fast and light). It would be really tough to do with your full bag, and you have to return almost all the way to Pangboche to regain the trail so not much benefit to carrying your stuff all morning. We had lunch and coffee in Pangboche and then it was an additional 2 hours on easy trail to Dingboche. This was a big day, and it was tough, but doable for us – the lunch break helped a lot. You could do the basecamp trek and then see how you feel once you get back to Pangboche.
It’s also worth noting there used to be a trail from ADBC to Dingboche that is on most maps but be warned that it washed out in the 2015 earthquake. That was our original plan but luckily the teahouse was owned by a 12 time summiteer of Everest who warned us against it.
Thanks again for reading, and safe trekking!
Sara & Connor
Theadventuregoeson.com
Amazing! I am not sure there is anything else to say. We were looking at our Nepal Books today and I kept trying to impress upon them how you were just there! Right at the bottom of that huge mountain. The books just didn’t do it justice and we will have to pull up the blog tomorrow since your pictures are better. Your photos truly are amazing and make me want to get outside and do something (other than the hour long walk we did in the pouring rain today)!
Thanks for the kind words, Carrie! It was a truly incredible place to be, really hard to do it justice with pictures or words! Miss you! Nepal postcard is on its way! 🙂
What an amazing trip and trip report. I thoroughly enjoyed reading it and watching the video. Thank you for so many great tips.
We are planning EBC and Gokyo Trek in October this year. That, as you know, involves Cho La and Renjo Passes, but not Kongma La Pass. I believe that we are fit to do this.
However, this statement worries me a bit.
“Additionally, 3rd or 4th class scrambling is required at times (climbing using hands and feet, where a fall could lead to injury or death). ”
Doe this refer to all 3 passes or any part of the trek we are taking, or juts to Kongma La Pass?
The only other part that worries us is the cold. We are not sued to cold and don’t like it much. We will be well prepared though. We are doing it as a private tour with our own guide and porter. We are planning to spend 17 days doing it.
Another question in relation to costs along the trek. $44 per day for 2 people sounds very reasonable. Did you stay in most basic lodges, or did you stay in a bit more expensive lodges where available? We would like to stay in better quality accommodation where available, simply because of the cold, hoping that more expensive lodges will be warmer at night. Do you know how much extra we should budget for better quality lodges?
Thank you in advance.
Goyko
Thanks for the kind words Goyko! To answer your questions:
Renjo La has steep, icy steps as you can see in the video at 5:48 and Cho La also had a very steep descent from the pass. For all three passes the danger is proportional to the conditions (can be dry, snow, wet, icy). We had microspikes (see link below, you can buy these for $10 in Kathmandu) which made us feel more secure, but most people around us didn’t, they just went slowly and carefully. A slip on the descent from one of the passes would be serious, would result in a big fall and injury would be significant. But, if you take your time and are careful you should be fine, we haven’t heard of any major falls this season.
Regarding the cold, there’s a couple keys: 1 layers – merino wool base layers, synthetic puffy jacket or fleece for mid layers, big down jacket on top, gloves, scarf and wool beanie every night. 2 cleanliness – if you’re sweaty at all you’ll be much colder. Take a shower or do a thorough clean with baby wipes and you’ll be much warmer at night. 3 get hot/warm before getting in your sleeping bag. Down bags don’t create heat, they just trap it, so before laying down get close to the stove, drink hot tea, bring a hot water bottle to bed, etc.
Re: lodges, on a budget/quality scale of 1-10 we stayed around 6-8. Your assumption that better quality is warmer is correct, basically the more expensive lodges are newer, have better windows and insulation, less cracks/holes, etc. You can always ask for more blankets, most of the lodges had extra if you insist. To stay at the best places maybe add $5/day more for the accommodation itself and another $5 as the food for you and your guide will be slightly more expensive.
It is definitely cold, especially at night, but if you layer up and use some of these techniques, it won’t keep you from having an incredible trip!
Cheers!
Sara & Connor
theadventuregoeson.com
https://www.rei.com/product/890608/kahtoola-microspikes-traction-system
Thank you very much. That is all reassuring to hear. Hopefully, there won’t be any snow in October, but we will be prepared if there is. The snow only worries me if we get it on the 2 passes, but we will just have to take it slow.
Thanks again.
Goyko
This is an exceptional write up of your triip to Nepal and the three passes. It is by far the best one that I have seen and highly informative. We are returning in November to do the three passes. we first went in our twenties like you two and this will be our fourth trip back and three grown children later…. I know you too will return! Thanks for such a great visual and well written post. The video is fantastic too! Very impressed with this and I think I have read every write up on the three passes that there is! This is #1. One question, what camera did you use? Great shots. We are now in our fifties so lightweight bag is now critical! Thank you kindly! Safe travels from Canada🇨🇦.
Wow, we cannot thank you enough for the incredibly kind words! We had so much fun working on the post and video, but as you know, nothing compares to the fun of the trek itself! The camera is an Olympus OM-D E-M5. We are far from professional photographers and we’ve found it easy to use. It’s been a great camera for us, pretty lightweight, durable, and compact compared to similar cameras, and it’s known to be a good one for shooting a lot in the outdoors, including rain or snow which we do quite often – we’re from Seattle 🙂
Again, thank you so much for reading/watching and for your complements. We couldn’t find many comprehensive write ups when we were trying to prepare for the trek, so we though it might be helpful. I’m sure we’ll be returning to the area for years to come, as you said! What an incredible place. Safe and happy trekking!
Cheers,
Sara & Connor
theadventuregoeson.com
Finally got a spare hour to watch this amazing video and read this post, I savored every bit! I’ve been so excited to read. Your adventures are inspiring us to take up climbing! We haven’t gotten to do much hiking with our little Henry yet, but this is getting me so fired up to get back out and see the world. THANK YOU for sharing your adventures with us, it’s beyond inspiring, and I am loving living vicariously through you!
Katey! Thank you so much for your kind words, and for reading and following along with us as always. I love that you guys are taking up climbing! It is SO much fun, I’m sure you’ll be hooked, and as Henry grows, it’s something you can all do together, which would be awesome. It’s got to be so challenging to stay active with a little one (understatement of the century)! I hope you know that you and Chris inspire us too. Someday we’ll likely try to become parents, and what a whole new adventure that will be. Take good care of yourself and your adorable fam! Sending love!
You guys are my heros! Well done and congrats on being the dopest people ever!!!
hi , amazing video and blog it got me soo pumped for my trip !!
just one random question, when you mentioned battery charger did u mean a portable charger or did u mean a battery charger wall plug in for your camera to charge its batterys ?
Hi Brad! So glad that you liked the video and post. We’re so stoked for you – this was by far the most amazing trek we’ve ever done and you’re going to love it! As far as battery chargers go, we brought a battery charger for our camera battery that plugged into the wall. Most teahouses will do a full device/battery charge for $2-$5, so that’s what we used. However, our friends brought a portable charger that lasted almost the entire 3 weeks from which they could charge their phones/cameras. You’d save some money doing it this way, but you’d be carrying the extra weight. If you don’t mind the extra weight, bringing a portable charger would be a great idea, but we really tried to minimize our load and didn’t mind paying a few times for the charges. Have a great trek and let us know if you have any other questions!
Cheers!
Sara & Connor
theadventuregoeson.com
thanks for the reply , im certain ill love it too !
awk fair enough , just wondering would you have any clue which portable charger they had ?
thanks
also im in nepal for 31 days so i have abit of room to play with since the trek goes for around 20 days , so if its bad weather do u recommend i just wait till the next day to not miss out on any views ?
Unfortunately I don’t know what kind of charger they had. And yes, if you encounter bad weather, I definitely recommend that you wait it out so that you don’t miss the views! That’s what we did and we were glad we did it that way. It’s perfect that you have some flexibility with your time there. Enjoy!!
awesome , one last question did you take thoese pictures in 4k ? they look amazing
This is just awsome!! You two have shown me things and places I’ve never seen ‘cept in some magazines, but yours are personel to me and Sue. Absolutely enjoy following you around the world. PS. I was kidding about giving you our place for a wedding gift Ha! We love you guys
Wait you were kidding? We sold all our stuff Don, we’re planning to move into your place when we move home! ( ;
Thanks for following along! See you in a few months.
What an amazing post! Beautiful sceneries and stunning photos!
And congratulations not only for the hike but also for the exceptional review. Very informative
Thank you so much for reading! It was such an incredible experience. Glad we could share it with you. Happy trails!
This is amazing! What a great video and what a great story! I loved it all, and the pictures are incredible. I really hope I can go one day! What an adventure! Thank you for sharing.
Thanks so much Alicia! Glad you enjoyed it. I hope you can make it to Nepal, it’s amazing 🙂
Such a great article with great pictures/video! Extremely informative. I am doing my trip planning (hopefully in November still:)) and was wondering if you could share the information about the guide/porter you used, and how you found him?
Hi Sharon! Thanks for the kind words. We didn’t hire a guide/porter and felt very comfortable navigating the hike and carrying our own gear. You can hire a guide/porter ahead of time (there’s plenty you can find online, this is what we’d recommend) or hire them in person, in Kathmandu or Lukla. Good luck and have fun!
Hi Sara & Connor, Thanks for the best blog on the 3P trek. Very helpful comments all over. Loved the vid as well, I would watch the full 5 hours that you’d probably shot during the trip ;-). I’m sort of preparing for this trip in the late season of 2018 with my son. We did the AC & ABC in 2014 which was great! in 2017 I did the AC again, but this time with my wife (we did ABC back in 1996!!!!). Would you say that in October & November the trek will definitely be more crowded than in April – May? In the pre season you’ll probably encounter the Everest Expeditions as well. Enjoy Life and travel when you can! Cheers!
Thanks for the kind words Martin! We had so much fun on the trip and could hardly contain or excitement.
Wow, you got to see Nepal at such a cool time! We did the AC shortly after this trip and I can’t imagine how different it must have been in 1996.
Re: Oct/Nov that’s a good question. From what most of the teahouse owners told us the Sep/Oct time is more busy than the spring season, but I don’t know about November. You’re getting into winter which from what we read is no crowds at all. Try posting the same question here: https://www.lonelyplanet.com/thorntree/forums/asia-indian-subcontinent/nepal
There’s a couple people on their who have been in the fall and the winter. I found that forum to be super helpful planning our trip. Be safe and have fun!!
Cheers. I’ll post it there as well! Happy travelling!